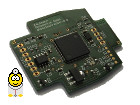
Okay, I'm just going to copy and paste my post from the Polo 9N info forum here; hopefully it will be helpful to someone.
"Hey OP, how did you manage to address individual pixels? While the navigation system in the Polo has a dot character, using it would result in a very high bus load and slow image rendering when drawing on the display."
Here's what it looks like on the LCD screen:
https://www.youtube.com/watch?v=eoAqhVP7CjE
A CAN logger and experiments in a car are essential to familiarize oneself with the subject matter. This tutorial provides assistance in understanding the telegrams present on the CAN bus, specifically those related to the transport protocol, the display data protocol, and the OSEK heartbeat ring.
To send data to the MFA display, it is primarily necessary to understand Transport Protocol 1.6. The display data protocol is transmitted using payload messages. Originally, TP 1.6 was used to transmit diagnostic data between the gateway and the control unit, as the K-line was no longer available.
I'm trying to keep the TP 1.6 tutorial as general as possible, but I will still explain it using the examples of the "Tacho" (speedometer) and "Radio" components.
[size=150]
Transport Protocol 1.6[/size]
Basic communication flow in TP 1.6:
1. Establishing a communication channel and negotiating communication IDs.
2. Exchange of protocol-specific data, e.g., timing values (already using the agreed-upon communication IDs).
3. Transmission of data.
4. Change of direction.
5. Receiving user data.
6. Change of direction or termination of communication.
text
// If the process ends here, it's over. However, if there's a change in direction, it continues!
7. Sending of user data.
8. Change of direction.
9. ETC...
[size=150]
Setting up the communication channel[/size]
When the radio starts playing:
1. Radio asks a question.
2. Tacho replies.
When Tacho starts:
1. "Tacho asks a question."
2. Radio responds.
The message for request and response is 3 data bytes in size and consists of the CAN ID (AAA), the device ID of the control unit with which communication should be established (BB),
OP Code (CC), The desired custom communication ID (DD) later on.
0xAAA 0xBB 0xCC 0xDD
The first step is the CAN identifier (AAA).
Each participant has a base ID and a device ID.
The base ID of the radio is
0x4A0.
The device ID of the radio is
0x36 or
0x39. Both are possible later, but I will continue to assume
0x36 for now.
The base ID of the tachometer is
0x2E0.
The device ID of the tachometer is
0x08.
To obtain the identifier for the request, you add the base ID and the device ID.
Radio =
0x4D6
Tacho =
0x2E8
The second step is the operation code (CC).
There are 3 possibilities:
0xC0 = request
0xD0 = Answer
0xD8 = Rejection of communication.
The third step is the communication ID (DD).
It is calculated from the base
0x600 + device ID for radio
0x36 + a device-specific offset for the speedometer
0x60, radio
0x80, depending on who is sending the message.
At this point, the device ID of the radio is used to differentiate between devices, as multiple participants may simultaneously have a TP channel open to the speedometer.
This results in the following communication IDs:
Odometer:
0x696
Radio:
0x6B6
Since the base of
0x600 is apparently obvious, only the least significant byte is transmitted in each case, i.e., for the radio
0xB6 and for the speedometer
0x96.
Here's an example of a complete communication process:
where the radio establishes communication.
0x4D6 0x08 0xC0 0xB6
0x2E8 0x36 0xD0 0x96
where the tachometer establishes communication.
0x2E8 0x36 0xC0 0x96
0x4D6 0x08 0xD0 0xB6
[size=150]
Exchange of protocol-related data[/size]
So far, so good. The communication is established, and the identifiers for further transmissions have been negotiated (
0xB6 and
0x96).
Now, protocol-related data is exchanged, such as block size (which will be explained later) and timing values.
If the radio initiated communication:
1. The radio transmits protocol-related data.
2. The speedometer responds with protocol-specific data.
If the dashboard initiated the communication, then the entire process is exactly the opposite.
The message for this is 6 data bytes in size and consists of the CAN ID (AAA), operation code (BB), block size (CC), and timing values (T0 - T3).
0xAAA 0xBB 0xCC 0xT0 0xT1 0xT2 0xT3
The first step is the CAN ID (AAA).
From this point onwards, until the TP channel is terminated or acknowledged, the communication IDs of the transmitting participants will be used.
If the radio broadcasts the message:
0x6B6.
The speedometer:
0x696.
The second step is the opcode (BB).
Here are two possibilities:
0xA0 = Request
0xA1 = Answer
The third step is the block size (CC).
Die Blockgröße gibt an, ab wieviel gesendeten Nutzdatennachrichten ein Acknowledge erwartet wird. DMore later.
The range of values is between
0x01 and 0x0F.
The fourth step involves timing values (T0 - T3).
T0: Maximum time between two messages (If exceeded, an acknowledgment will be sent).
T1: Maximum time between two blocks.
T2: Minimum time between two messages.
T3: Maximum time for telegrams expected to be received.
Each timing byte consists of a 2-bit prescaler and a 6-bit multiplier.
(PRESC1 | PRESC0 | MUL5 | MUL4 | ... | MUL0)
Prescaler values:
00 = 100 microseconds.
01 = 1 mS
10 = 10 milliseconds (ms)
11 = 100 mS
Multiplier values:
0x00 - 0x3F
The prescaler is simply multiplied by the multiplier, as its name suggests.
Here's an example of the communication process:
if the radio initiated the communication:
0x6B6 0xA0 0x04 0x82 0x84 0x46 0xC5
0x696 0xA1 0x04 0x8A 0x85 0x43 0x94
If the dashboard initiated the communication:
0x696 0xA0 0x04 0x8A 0x85 0x43 0x94
0x6B6 0xA1 0x04 0x82 0x84 0x46 0xC5
[size=150]
Sending of user data[/size]
A data frame message is between 1 and 8 data bytes in size and consists of the CAN identifier (AAA), the control byte (BB), and the data bytes (D0 to D6).
0xAAA 0xBB 0xD0 0xD1 0xD2 0xD3 0xD4 0xD5 0xD6
The first step is the CAN ID (AAA).
Here, the communication IDs are being used again (0x6B6 and 0x696).
The second step is the control byte (BB).
Here, things get more complicated because this byte contains a significant portion of the TP 1.6 data.
The individual bits of the byte:
( NV | NV | /REQUEST ACK | DIRECTION CHANGE | COUNTER BITS 3-0 )
Bits 7 and 6 are not used.
Bit 5 is active (set to 0). If this bit is "LOW", the receiver sends an acknowledgement.
Bit 4 is active (set to 1). If this bit is HIGH, a direction change is forced, and the receiver starts sending data.
The Lownipple (bits 3-0) of the control byte is incremented with each message sent. In case of an overflow (greater than 0xf), it simply resets to 0x0.
After a change in direction, it also continues with 0x0.
The acknowledgement message is 1 byte long and consists of the CAN ID (AAA) and the actual acknowledgement message (BB).
0xAAA 0xBB
The first step is the CAN ID (AAA).
Here, the communication IDs are being used again (0x6B6 and 0x696).
The second step is the ACK message (BB).
The highnipple is always
0xB.
The Lownipple value increments with each received data message.
Now I have reached the right place to discuss the topic of "blocks." A block consists of a certain number of data messages.
As previously described, this number is determined during the exchange of protocol-related data. In my example above, a block containing 4 user data messages is considered large.
Here's the translation:
This means that for every fourth data message, bit 5 of the "LOW" control byte is set, and the receiver sends an acknowledgment (ACK) message. If a block is not full (containing only 1-3 data messages),...
"In this case, the receiver sends the final acknowledgement upon direction change."
After the direction change, the original receiver (which now becomes the sender) transmits its data according to the same scheme.
After a change in direction and the participant who is now transmitting has no data to send, the participant acknowledges the communication.
The acknowledgment message is 1 byte long and consists of the CAN ID (AAA) and the operation code (OP Code) (BB).
0xAAA 0xBB
The first step is the CAN ID (AAA).
Here, the communication IDs are being used again (0x6B6 and 0x696).
The second step is the opcode (BB).
0xA8 = Acknowledge.
Here's an example of the communication process:
0x4D6 0x08 0xC0 0xB6 // Initialize communication.
0x2E8 0x39 0xD0 0x96
0x6B6 0xA0 0x04 0x82 0x84 0x46 0xC5 // Exchanging protocol-related parameters
0x699 0xA1 0x04 0x8A 0x85 0x43 0x94
0x6B6 0x20 0x00 0x00 0x00 0x00 0x00 0x00 0x00 // Sending payload data.
0x6B6 0x21 0x00 0x00 0x00 0x00 0x00 0x00 0x00
0x6B6 0x22 0x00 0x00 0x00 0x00 0x00 0x00 0x00
0x6B6 0x03 0x00 0x00 0x00 0x00 0x00 0x00 0x00 // 4-byte block full, acknowledgement requested.
0x696 0xB4 // Acknowledgment: 4 data packets received.
0x6B6 0x24 0x00 0x00 0x00 0x00 0x00 0x00 0x00
0x6B6 0x15 0x00 0x00 0x00 0x00 0x00 0x00 0x00 // Last data packet, direction change!
0x696 0xB6 // Acknowledgment: Received 6 data messages.
0x696 0x20 0x00 0x00 0x00 0x00 0x00 0x00 0x00 0x00
0x696 0x11 0x00 0x00 0x00 0x00 0x00 0x00 0x00
0x6B6 0xB2 // Acknowledgment: 2 data packets received.
0x6B6 0xA8 // Acknowledge communication.
This concludes the explanation of Transport Protocol 1.6.
[size=150]
The display data protocol:[/size]
Since the DDP tutorial is older, the later communication examples assume a radio device ID of 0x39, not 0x36 as in the TP 1.6 tutorial.
In the explanations, the IDs are kept variable with "X".
A DDP message is divided into multiple TP 1.6 data messages depending on its length.
The display is divided into 3 segments: radio display, MFA/navigation display, and speed display. These can be used individually or in combination, resulting in a total of 6 possible segment configurations.
To display text or symbols on the screen, a data channel must be opened for each display segment used. Each data channel has a number from 0x00 to 0xFF, which is assigned by the instrument cluster when a channel is registered. A maximum of 3 channels can be registered per device.
Once a data channel has been created for a segment and configured for data acquisition, it can be described as long as the tachometer allows it. A data channel can also be reconfigured or deleted later, within certain limitations.
[size=150]
OP Codes of the DDP messages[/size]
The first byte of your DDP message contains an opcode that determines which function the message should perform.
Radio Opcodes / DDP Participants
0x00 = Delete all DDP channels of your DDP participant (OP/Device ID).
0x01 = Request display segment size (OP/Segment number [explanation of segments see OP code 0x02]).
0x02 = Register DDP channel (see detailed description below).
0x05 = Deregister DDP channel (OP/channel number).
0x06 = Change DDP channel menu mode (OP/channel number/menu mode [explanation of menu mode see OP code 0x02]).
0x09 = Send data for the DDP channel (see detailed description below).
0x0A = Jumps to the menu entry for the channel (OP/channel number).
0x0B = Switch display segment (OP/channel number/new segment).
0x0C = Prioritize DDP channel (OP/channel number).
0x0D = Delete all channels of the DDP participant (OP/0x00/0x00).
0x15 = Send DDP participant status (OP/Device ID/0x20/0x01/Status [0x00 = Off, 0x01 = On]).
Tacho opcodes
0x20 = All DDP channels of the DDP participant have been deleted.
0x21 = Send display segment sizes (OP/Tachometer internal segment number/0x00/Width in pixels high/Width in pixels low/Height in pixels high/Height in pixels low).
0x23 = Request to send data for the DDP channel; transmits channel parameters (OP/channel number/channel status [0x00 = locked, 0x01 = data requested]).
0x25 = General acknowledgement.
0x27 = Status of the DDP channel, transmitting channel parameters (OP/channel number/channel status).
0x2A = DDP channel; exit by jumping to the main menu (OP/channel number).
0x2B = Error (OP/Channel Number/Error Code)
Error codes:
0x01: Unknown opcode.
0x02: Message incomplete.
0x03: Unknown channel number.
0x04: Unknown segment.
0x05: Error in display data.
0x06: ?
0x07: The x-coordinate is too large for the segment.
0x08: The Y coordinate is too large for the segment.
0x09: The maximum number of channels (3) has been exceeded.
0x35 = DDP participant disconnected (operator).
[size=150]
Registering a data channel[/size]
A data channel has various parameters:
- With/without menu entry and name.
- Display segment
Message structure for registering a data channel:
text
Header:
Byte 0: OP Code Create data channel = 0x02.
News:
Byte 0: With menu entry = 0x70, Without menu entry = 0x71-0x85 (The lower the value, the higher the priority).
Byte 1: Device ID = 0x3X
Byte 2: All segments = 0x00, Middle segment = 0x10, Upper segment = 0x20, Lower segment = 0x30, Upper + Middle segment = 0x40, Middle + Lower segment = 0x50.
Byte n: Label menu entry ASCII (if byte 0 = 0x70).
[size=150]
Describing a data channel[/size]
For each text/graphic message, the corresponding data channel number is transmitted along with it.
Message structure for transmitting text/graphic messages (sent by DDP participants):
text
Header:
Byte 0: OP Code - Send data for the DDP channel = 0x09.
Byte 1: Data channel number.
News:
Byte 0: Character size: 0x57 (medium characters), 0x69 (large characters), 0x55 (small characters).
Byte 1: 0x05 + Length of the string following byte 6.
Byte to Bit.
0: Toggle active pixels of the character on the display.
1: Normal font = 1, Inverted font = 0.
2: Small font = 1, Normal font = 0.
3: Graphic elements = 1, Characters = 0.
4: Large characters = 1, normal characters = 0.
5: Centrist = 1, Left-leaning = 0
6: Overwrite display line = 1, Clear entire display = 0.
7: Not used.
Byte 3: X position in pixels (low byte).
Byte 4: X position in pixels (high byte).
Byte 5: Y position in pixels (least significant byte).
Byte 6: Y position in pixels (high byte).
Byte n: Arrow data 0x00 - 0x74, text data ASCII.
Byte n

: End character = 0x08.
Example:
The messages from the DDP are simply written sequentially into the 7 bytes of payload data of the transport protocol message.
Opening a data channel
0x4D9 0x08 0xC0 0xB9
0x2E8 0x39 0xD0 0x99
0x6B9 0xA0 0x04 0x82 0x84 0x46 0xC5
0x699 0xA1 0x04 0x8A 0x85 0x43 0x94
0x6B9 0x20 0x02 0x70 0x39 0x10 0x41 0x42 0x43 // With menu entry (0x70), Name: ABCDE, Segment: Middle (0x10)
0x6B9 0x11 0x44 0x45
0x699 0xB2
0x699 0x10 0x23 0x04 0x01 // The speedometer requests data from channel, channel number = 0x04, the speedometer wants text/graphic data for this channel.
0x6B9 0xB1
0x6B9 0xA8
Describing the data channel
0x4D9 0x08 0xC0 0xB9
0x2E8 0x39 0xD0 0x99
0x6B9 0xA0 0x04 0x82 0x84 0x46 0xC5
0x699 0xA1 0x04 0x8A 0x85 0x43 0x94
0x6B9 0x20 0x09 0x04 0x57 0x0a 0x02 0x02 0x00 // Channel number = 0x04, number of characters to transmit = 5, non-inverted font, X position = 0x02
0x6B9 0x21 0x03 0x00 0x48 0x41 0x4C 0x4C 0x4F // Y Position = 0x03, Text = HALLO
0x6B9 0x12 0x08 // End of transmission
0x699 0xB3
text
0x699 0x10 0x27 0x04 0x01 // Status transmission, data channel number = 0x04, speedometer still wants data for this channel.
0x6B9 0xB1
0x6B9 0xA8
Deleting the data channel
0x4D9 0x08 0xC0 0xB9
0x2E8 0x39 0xD0 0x99
0x6B9 0xA0 0x04 0x82 0x84 0x46 0xC5
0x699 0xA1 0x04 0x8A 0x85 0x43 0x94
0x6B9 0x10 0x05 0x04 // Disconnect, channel number = 0x04
0x699 0xB1
0x699 0x10 0x25 0x04 // Disconnected, channel number = 0x04
0x6B9 0xB1
0x6B9 0xA8
General note:
The instrument cluster has a lot of functions to perform. Therefore, the display is the least important function of this control unit (as indicated by the high identifiers in the CAN communication).
The dashboard needs time to process data. If data packets are sent too quickly in succession, it might simply forget to send a data request or fail to display the transmitted data. So, always be patient.
Therefore, the display is not suitable for high refresh rates.
[size=150]
The Heartbeat Ring:[/size]
The control units on the Comfort CAN bus send heartbeat messages in a specific sequence. Each control unit refers to the next one, and the last one refers back to the first. The "Ringmaster" devices are the gateway (device ID 0x00) and the speedometer (device ID 0x08).
Immediately after the ignition is turned on, the gateway starts the ring initialization process. 30 milliseconds later, the speedometer completes this process. Within those 30 milliseconds, each remaining node in the ring sends an initialization message.
Control units that join the ring later simply send their initialization message and wait for a leading control unit to reference them. The new STGR initially references the gateway, which is 0x00. If a previously registered control unit is now being bypassed, it will report a re-initialization. The new control unit must listen for this and then reference it in the next ring cycle.
The identifiers of the heartbeat messages consist of the base
0x400 added to the device ID.
In the case of a DDP participant, therefore
0x43X.
The message consists of 6 bytes.
The first byte contains the device's own reference ID when an error is detected or during initialization (i.e., the first heartbeat message sent by a control unit). For device ID 0x39, the reference ID is 0x19, but for device ID 0x36, it is 0x16.
Byte 0: Reference ID of the next control unit (
0x00 to
0x1f) / During registration or in case of an error, use your own.
Byte 1: Own Status: 0x01 = Normal operating mode; 0x02 = Error detected; 0x11 = Ready for standby; 0x31 = If a control unit detects that it and all other units are ready for standby, this value disables the ring for standby. The ring will only be reactivated when the ringmaster 0x400 sends its initialization message.
Byte 3: 0x00 = Normal mode; 0x80 = Login mode.
The CAN ID range approved for use in the Polo is:
0x400 - 0x43F.


 Bookmarks
 Garage
 FAQ, Legal Notice & Privacy
 RSS Feed
 Register
 Login
Login



 .
.

 .
.